How to Assign a public IP to a Virtual Machine
Step-by-step guide to configuring public IP access for your virtual machine on Neviri Cloud.
Log in to your Neviri dashboard and navigate to Network management → Routers
Access your Neviri Cloud dashboard and go to Network management, then select Routers from the menu.
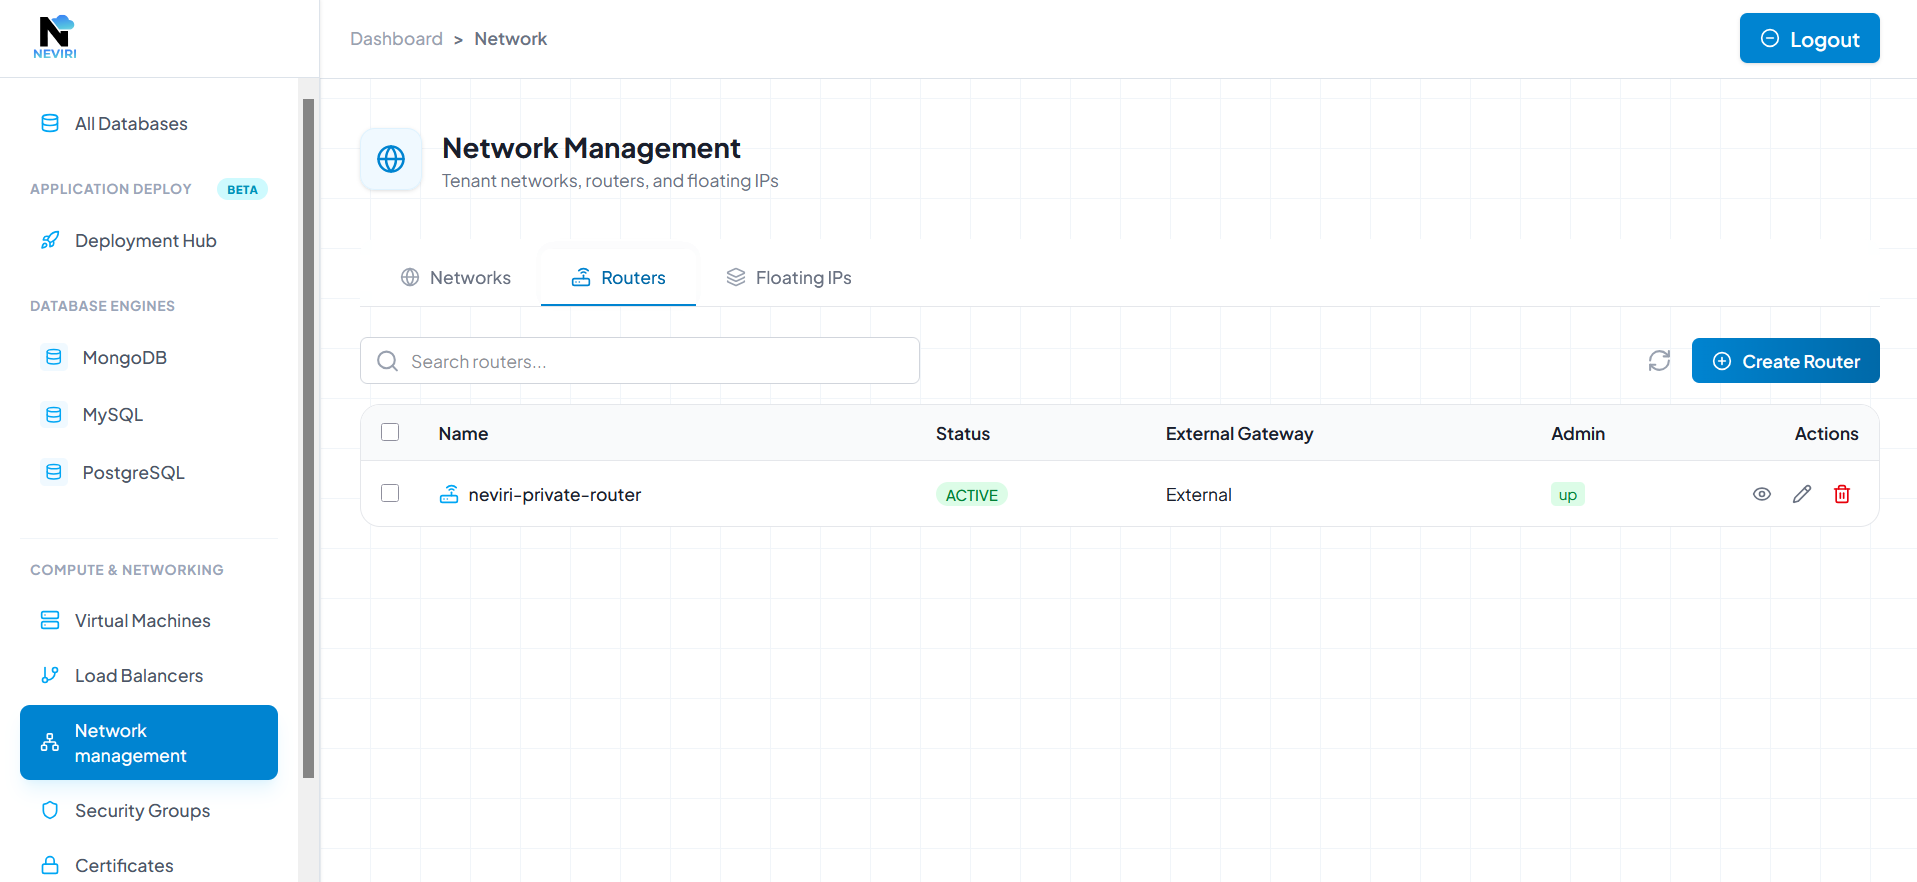
Navigate to Routers in Network management
Click on Create Router
Click the "Create Router" button to begin the router creation process.

Click Create Router to start
Name your Router and select External Gateway
Give your router a descriptive name and make sure to select "External Gateway" to enable public internet access for your virtual machines.
Click on Create Router
Confirm your settings and click the "Create Router" button to create the router.
Now you need to attach your Private network to that router
Select the router you just created, click on "Attach", and select your private network from the dropdown menu.
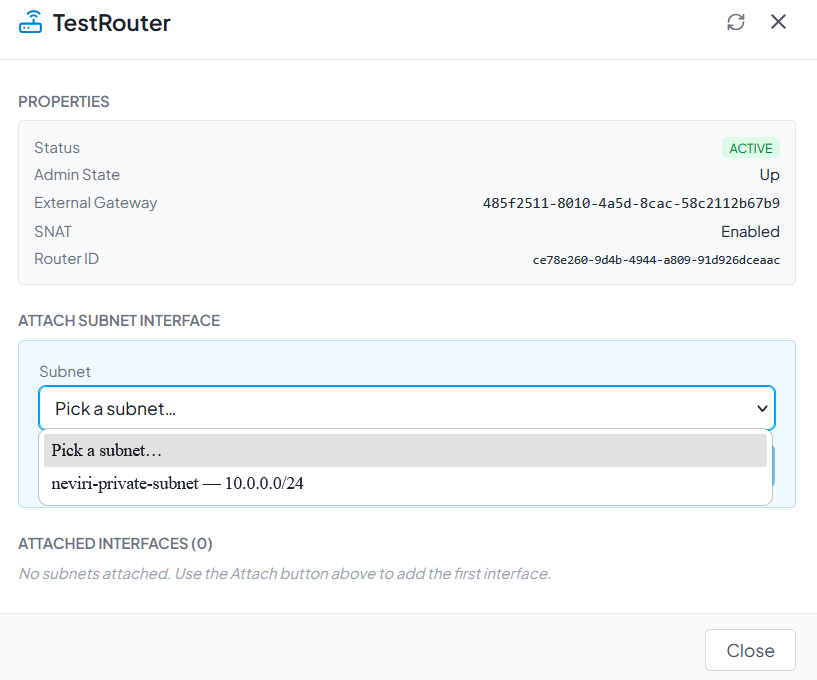
Attach your private network to the router
Click on Attached
Click "Attached" to confirm. Now your private network has been attached to the router.
Your network will now also be shown while creating a Virtual Machine in the network dropdown menu
Once attached, your private network will appear in the network dropdown menu when creating new virtual machines, allowing them to access the public internet through the router.