How to create a Virtual Machine
Step-by-step guide to provisioning and configuring your first virtual machine on Neviri Cloud.
Login to the Neviri Dashboard
Navigate to https://neviri.com and log in using your email address and password. If you have two-factor authentication enabled, you'll need to complete that step as well.
Click on 'Virtual Machines' in the main dashboard
From the main dashboard, locate and click the "Virtual Machines" option to access the VM management interface. This will take you to the page where you can view, create, and manage all your virtual machine instances.
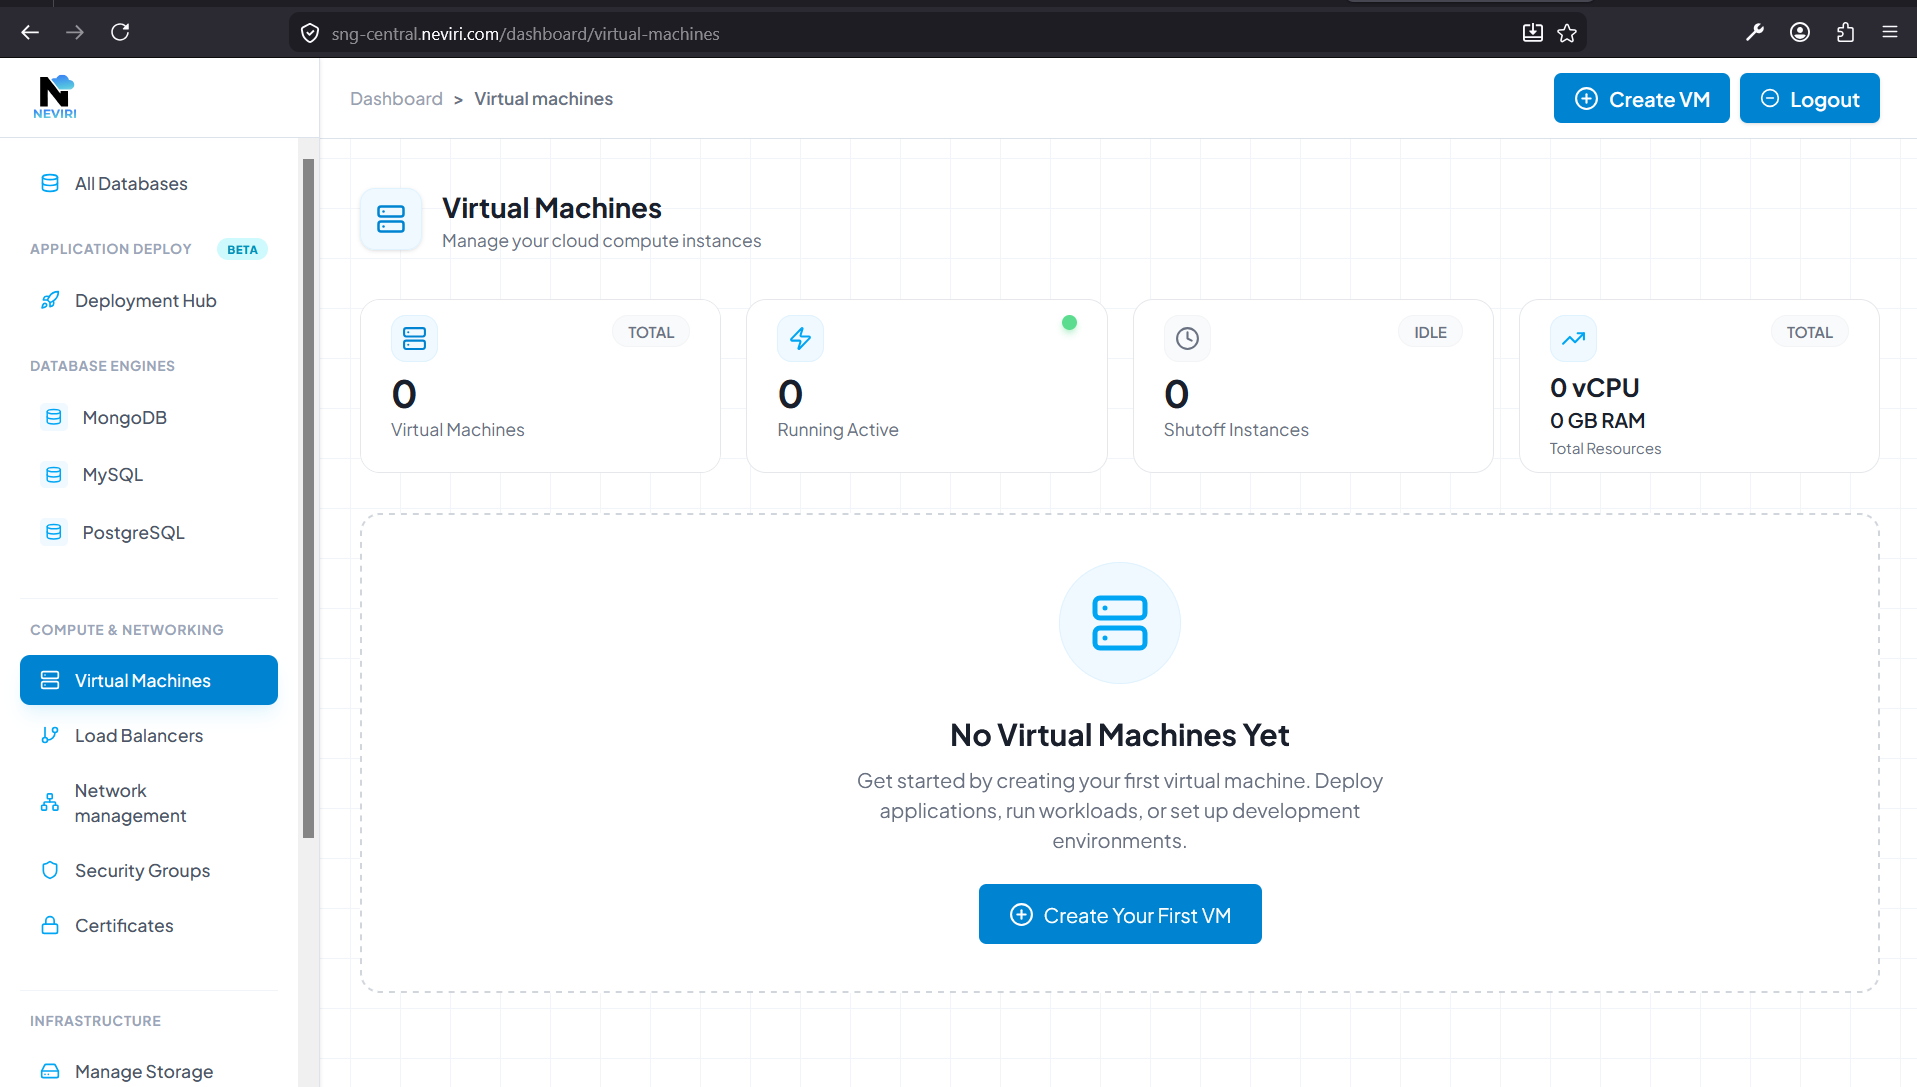
Virtual Machines management interface
Select "Create your First VM" and add your payment details
Click the "Create your First VM" button to begin the VM creation process. If you haven't added a payment method yet, you'll be prompted to enter your billing information. Neviri Cloud uses secure payment processing, and you'll only be charged for the resources you actually use.
Set the name of your VM and its quantity
Give your virtual machine a descriptive name that helps you identify it later. You can also specify the quantity of identical VMs you want to create at once. This is useful when you need multiple instances with the same configuration.
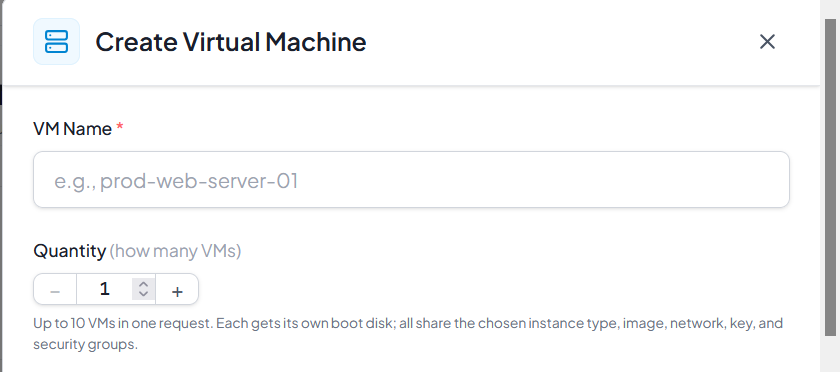
Configure VM name and quantity
Select an Instance Type
In the Instance section, select the appropriate instance type from the dropdown menu for your Virtual Machine. The instance type determines the CPU, memory, and other hardware specifications of your VM. Choose based on your workload requirements:
- General Purpose – Balanced CPU and memory for most workloads
- CPU Optimized – High-performance computing and batch processing
- Memory Optimized – Large databases and in-memory caches
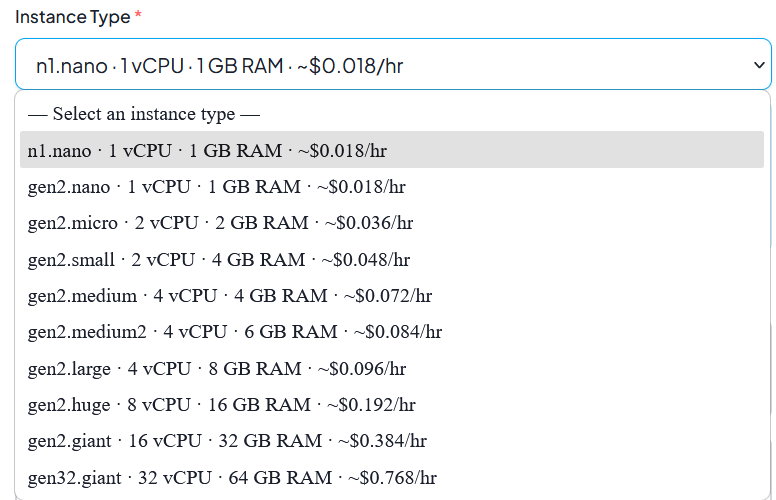
Select instance type from dropdown menu
Select the OS Image
Select the base OS image for your virtual machine from the list of available images. Click to select the operating system that fits your needs. Neviri Cloud offers a wide range of operating systems including:
- Ubuntu – Popular Linux distribution for general purpose
- Debian – Stable and secure Linux distribution
- CentOS/Rocky Linux – Enterprise Linux distributions
- Windows Server – For Windows-based applications
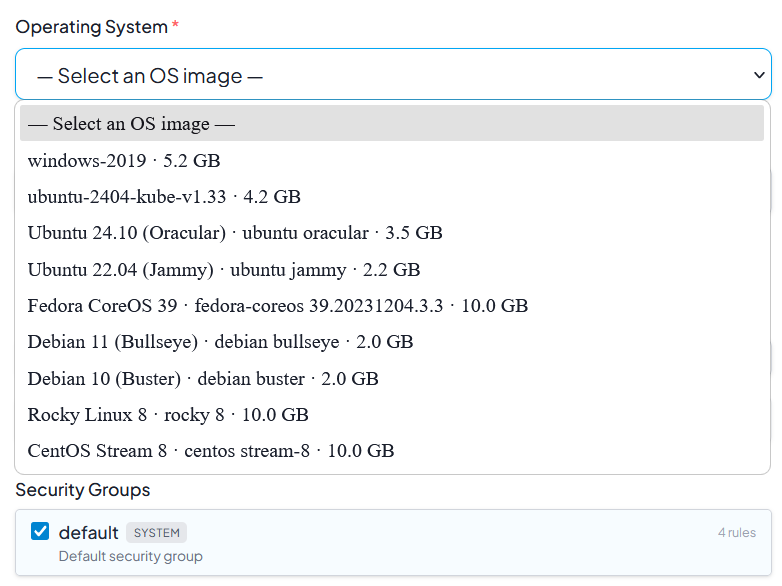
Choose your preferred operating system
Select the Network Type
The network determines which virtual network your VM will be connected to. Your VM joins a private network with internet access. For public inbound access, you can add a floating IP from the Networking tab after the VM is created.

Select the appropriate network for your VM